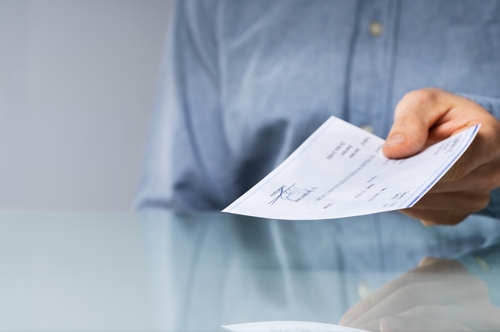
Business checks remain a staple in commerce despite the rise of digital payment methods. If you’re receiving payment from a company, processing payroll, or accepting payment for services, understanding how to read a business check is an important financial skill.
At Remitly, we simplify financial processes, especially for international transactions. In this guide, we break down the components of business checks, explain how to verify their authenticity, and offer practical guidance on properly handling and processing them.
Understanding the purpose of business checks
A business check is a payment method issued by a company rather than an individual. It’s commonly used to pay vendors, employees, or service providers. Unlike personal checks, business checks often include additional details such as a company name, logo, address, and enhanced security features to prevent fraud.
Business checks have a paper trail, which many organizations prefer for accounting purposes. They provide a written record of transactions, aiding in bookkeeping and accounting. If you are an immigrant new to the US, you might encounter these when starting a job, receiving refunds, or working with US-based businesses, especially for expenses that might not be suitable for credit cards or electronic transfers.
The importance of reading checks accurately
Misreading a check can lead to delayed deposits, bank rejections, or even fraud. Knowing what each part of a business check means protects you from errors and scams. Learning to read checks properly will help you:
- Prevent errors in recording payments
- Spot red flags that may indicate fraud
- Ensure compliance with banking requirements
- Track income and identify suspicious activity
Let’s break down each component of a business check so you know what to look for.
Identifying the parts of a business check
A business check contains several basic components, each serving a specific purpose in the transaction process. Understanding these elements is vital for properly processing any business check you receive.
- Check number location
The check number usually appears in two locations on most business checks:
- The upper right corner, normally displayed prominently
- The bottom edge of the series of numbers printed in the MICR (Magnetic Ink Character Recognition) line
This number serves as a unique identifier for each check issued from a specific account, matching it to the issuer’s records. Check numbers usually run in sequence, helping both the issuer and recipient track transactions and reconcile accounts.
If you regularly receive payments from a particular business, noting check number sequences can help identify potential issues if a check appears out of order.
- Find the routing number on the check
The routing number, also called the ABA routing transit number identifies the financial institution that issued the check. It’s a nine-digit code located at the bottom left of the check. Routing numbers are used in wire transfers and direct deposits.
On standard business checks, you’ll find the routing number:
- At the bottom of the check as the first set of numbers in the MICR line
- Usually enclosed between two special symbols that resemble colons (:)
This number is necessary for processing the check because it directs the payment to the correct financial institution. Every bank in the United States has at least one unique routing number, with larger banks often having multiple routing numbers that vary by state or region.
Tip: You can confirm a routing number’s legitimacy using the American Bankers Association’s lookup tool.
- Locate the account number on the check
Next to the routing number is the account number, which identifies the specific account from which the funds will be drawn when the check is processed.
This number is unique to the company’s checking account and is often 8–12 digits long, depending on the financial institution. The account number follows the routing number in the MICR line at the bottom of the check.
Be careful not to confuse this with the check number, which usually follows the account number.
When depositing a check, your bank uses this number to request funds from the payer’s specific account. Accuracy is essential here—misreading or incorrectly entering this number could result in a rejected deposit or, in rare cases, an attempt to withdraw funds from the wrong account.
- Other key elements: date line, memo line, and signature line
Apart from the routing and account numbers, several other elements on a business check serve important functions:
- Date line: Located in the upper right corner, the date indicates when the check was written. In the US, this often follows the month/day/year format. Banks may reject checks that are too old, usually over six months. Consider confirming the check expiration duration.
- Payee line: Beginning with “Pay to the Order of,” this line specifies who can cash or deposit the check. If you’re the recipient, your name or business name should appear here.
- Amount box: This box contains the dollar amount, written in numerals (e.g., $1,250.75).
- Amount line: The amount is also written out in words (e.g., “One thousand two hundred fifty and 75/100”). The written amount is legally binding if there’s a discrepancy between the numerical and written values.
- Memo line: This optional field in the lower left corner allows the check writer to note the purpose of the payment, invoice number, or other identifying information.
- Signature line: Located in the bottom right corner, a valid check must be signed by an authorized representative of the business. Some business checks require multiple signatures for large amounts.
How to tell what bank a check is from
Identifying the issuing bank is important for verifying a check’s authenticity and inquiring about its status if necessary.
Understanding financial institution information
Most business checks noticeably display the name and logo of the issuing bank, usually in the top left corner or at the top center of the check. Many checks also include the bank’s address or branch information, further verifying the check’s origin.
For added security, many business checks feature watermarks or background patterns associated with the specific financial institution. These design elements are difficult to reproduce and serve as anti-counterfeiting measures.
Becoming familiar with these features can help you easily identify legitimate checks from major US banks.
Using routing numbers to identify banks
The routing number provides a definitive way to identify the issuing bank. If you need to verify which bank issued a check, you can:
- Search the routing number online through the American Bankers Association‘s official routing number lookup tool
- Ask your own bank to identify the issuing institution
- Use the Federal Reserve’s E-Payments Routing Directory
Knowing the issuing bank can be helpful if you need to verify a check’s validity or if there are any issues with the check clearing.
Ensuring check accuracy and validity
FinCEN reported over 15,417 Bank Secrecy Act (BSA) reports related to mail theft check fraud in a six-month period in 2023, amounting to more than $688 million in suspicious activity. With check fraud being a significant concern in the US, knowing how to verify a business check’s authenticity is an essential skill.
How to verify a business check
Several steps can help ensure a business check is legitimate:
- Examine the paper quality: Legitimate business checks are printed on high-quality paper with security features that may include watermarks, color-shifting ink, or microprinting.
- Check for perforated edges: Most business checks come from checkbooks with perforated edges. The absence of these could indicate a counterfeit check.
- Look for security features: Many business checks include security features like chemical-reactive paper that changes color when tampered with, or security backgrounds that reveal alterations.
- Verify the MICR line: The numbers at the bottom should be printed in magnetic ink, which has a slightly raised feel compared to regular ink.
- Contact the issuing bank: If you have concerns, contact the bank listed on the check using the contact information you find independently, not from the check itself, to verify the account exists and has sufficient funds.
Identifying fake or fraudulent checks
Be alert for these common warning signs of fraudulent business checks:
- Inconsistencies in bank information: Mismatches between the bank name printed on the check and the routing number.
- Missing or incorrect security features: Absence of security features like watermarks, color-shifting ink, or microprinting that legitimate checks commonly include.
- Routing number discrepancies: Routing numbers that don’t match the bank named on the check or that don’t follow the proper nine-digit format.
- Unusual check numbers: Very low check numbers (like 1001) on a check from an established business could indicate fraud.
- Poor print quality: Legitimate business checks use high-quality printing. Blurry logos, uneven text, or unclear printing might indicate a counterfeit.
- Pressure to deposit quickly: If someone gives you a check and pressures you to deposit it immediately, this could be a red flag for fraud.
If you suspect a check might be fraudulent, contact your bank before attempting to deposit it. Many banks have fraud prevention departments that can help verify suspicious checks.
Handling business checks effectively
Once you’ve verified a business check’s authenticity, proper handling ensures smooth processing.
How to endorse and accept a business check
The standard practice in the US is to endorse a check right before you deposit it rather than as soon as you receive it. This reduces the risk if the check is lost or stolen before you can deposit it. Below is how to do so:
- Turn the check over: The endorsement area is on the back of the check, usually marked with lines and the text “Endorse Here.”
- Sign your name: If the check is payable to you personally, sign your name exactly as it appears on the front of the check. If it’s payable to your business, write the business name followed by your signature and your title.
- Add “For Deposit Only”: For added security, especially if you’re not depositing the check immediately, write “For Deposit Only” above your signature, followed by your account number. This restrictive endorsement prevents others from cashing the check if it’s lost or stolen.
- Mobile deposit endorsement: If you’re using a mobile app to deposit the check, many banks require you to write “For Mobile Deposit Only” or similar language as part of your endorsement.
Using checks for direct deposit and other transactions
Business checks can be processed in several ways, such as:
- Traditional deposit: You can deposit the check at a bank branch, where a teller will process it and provide a receipt.
- ATM deposit: Most ATMs accept check deposits. The machine will scan the check and, in many cases, print an image of it on your receipt.
- Mobile deposit: Most US banks offer mobile deposit through their apps, allowing you to deposit checks by taking photos of the front and back.
- Remote deposit capture: Businesses that handle many checks often use scanning equipment that transmits check images directly to their bank.
- Check conversion: Some businesses convert checks to electronic payments at the point of sale, processing them more like debit card transactions.
Understanding these options helps you choose the most convenient and secure method for your situation. If you are an immigrant or new to the US banking system, mobile deposit apps often provide the easiest way to deposit occasional business checks without needing to visit a bank branch.
FAQs
What to write on the back of a business check?
When endorsing a business check on the back, you should include:
- The business name as it appears on the check (if the check is made out to your business)
- Your signature and position in the company
- “For Deposit Only” followed by your account number for added security
- Any special instructions required by your bank for mobile deposits
If you’re depositing a check made out to your business, the proper format would be:
For Deposit Only
[Business Name]
Account #XXXXXXXX
[Your Signature]
[Your Title]
This restrictive endorsement helps protect against fraud if the check is lost or stolen before deposit.
Can I deposit a business check made out to my company into my personal account?
Generally, this is not permitted in the US banking system. Checks made payable to a business must be deposited into a business account. If you’re a sole proprietor operating under your own name (not a separate business name), you may sometimes be able to deposit these checks to your personal account, but it’s best to check with your bank first.
How do I verify if a business check has cleared?
To confirm that a check has fully cleared, check your online banking portal or mobile app for the deposit status. Next, look for the distinction between “pending,” “available,” and “posted” funds. Contact your bank’s customer service if you need confirmation and be aware that seeing funds as “available” doesn’t always mean the check has fully cleared.
Can I cash a business check at any bank?
If you don’t have an account at the bank that issued the check, you might face limitations including refusal to cash the check or a fee to cash it. Check-cashing stores are an alternative, but they are known to charge higher fees.